AX3 Set-up Guide
DownloadAUDIENCE
Research staff and wearable technology teams
DEVICE
Axivity AX3
DOCUMENT
Version 1.0
WORKFLOW
Install, connect, record, deploy, retrieve, export
RECORDING WINDOW
Seven-day continuous monitoring by default
OUTPUT FILE
.CWA file renamed by participant and trial number
Before you start
Prepare the sensor, a Windows computer, the OMGUI/AX3 GUI software (free software), a micro-USB to USB-A data transfer cable and the participant or trial ID. Confirm local ethics, consent and data storage procedures before issuing the device.
Set-up workflow
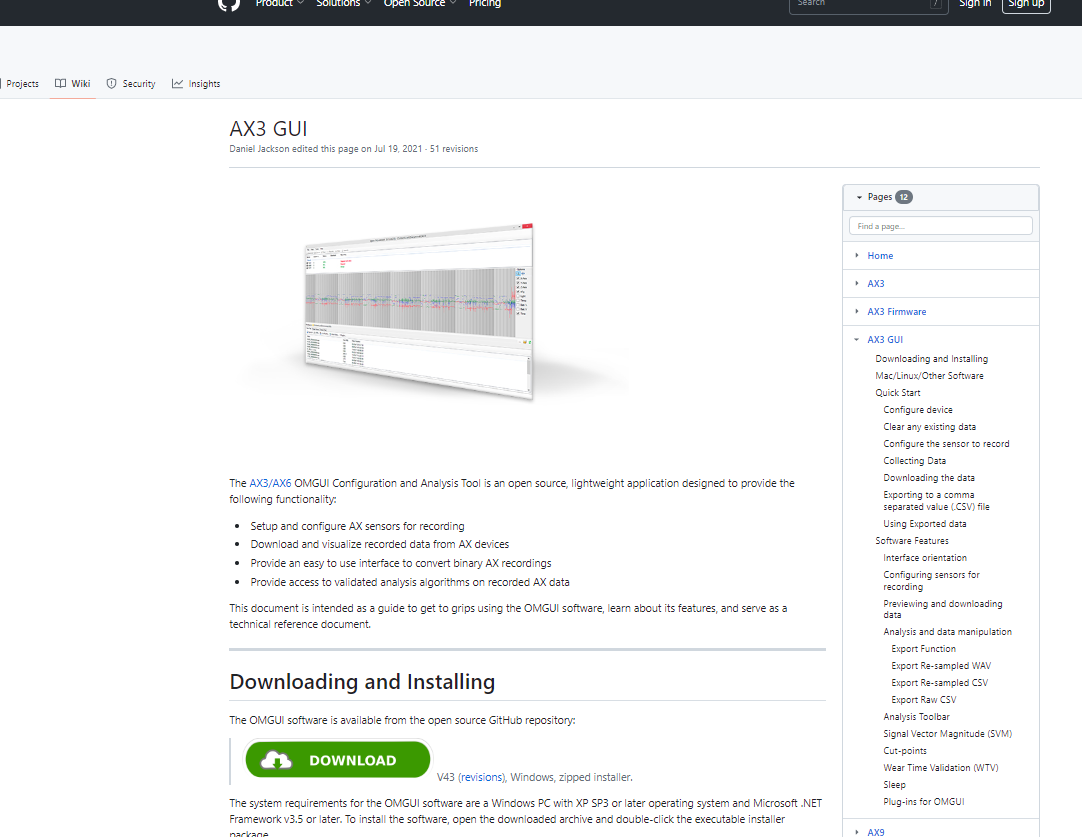
Download AX3 GUI
Download the AX3 GUI installer from the project repository using the green Download button.
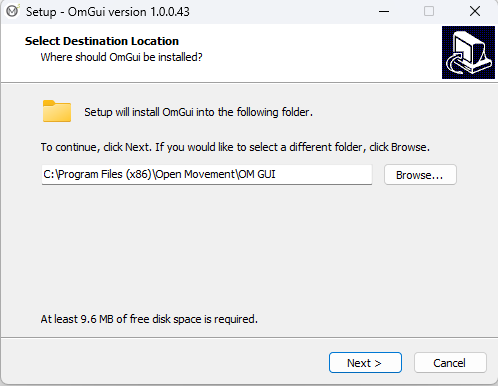
Install OMGUI
Run the downloaded AX3-GUI-__.exe file and follow the installation prompts. The installer will install the Open Movement Graphical User Interface.
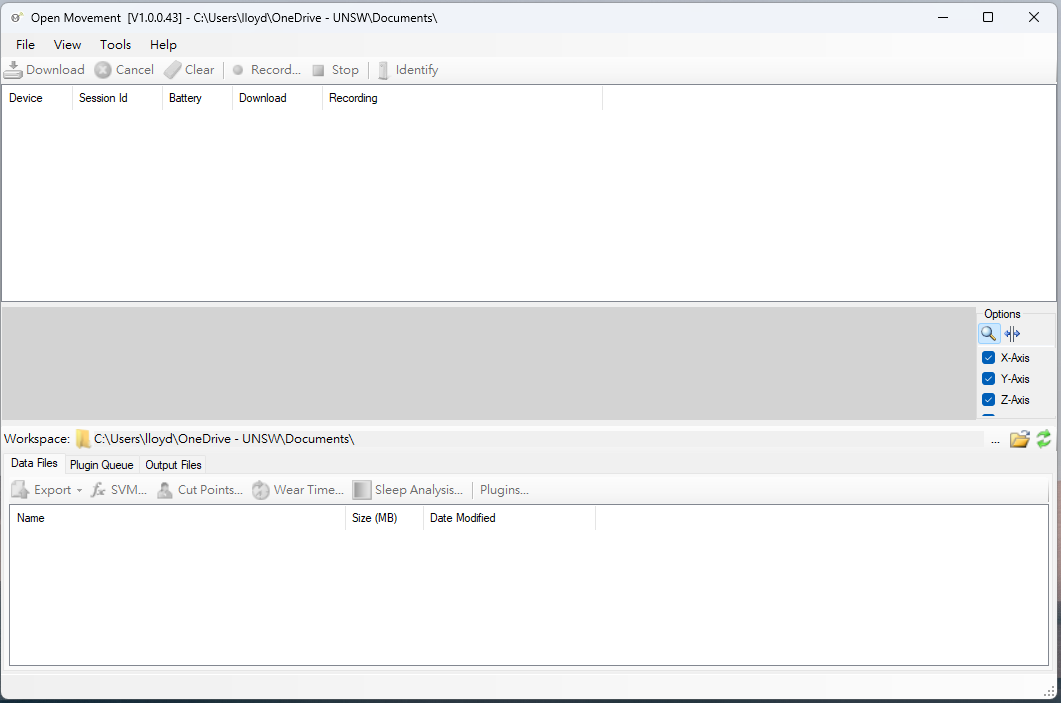
Open OMGUI
After installation, open OMGUI. Check that the main window opens correctly before connecting the sensor.
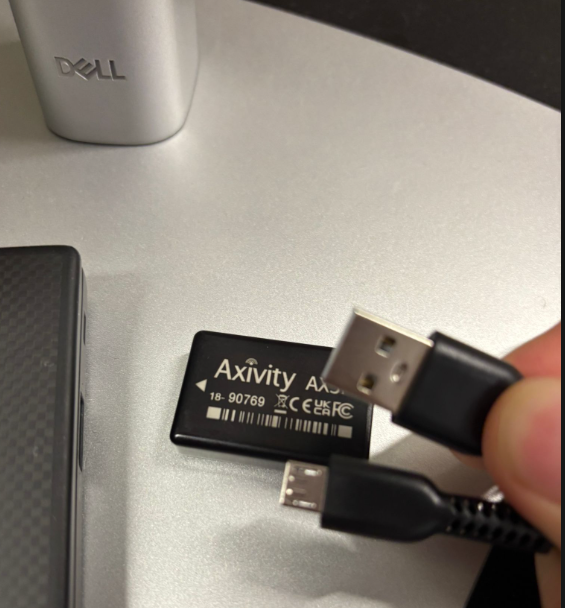
Connect the sensor
Plug the Axivity AX3 sensor into the computer using a micro-USB to USB-A data transfer cable.
Confirm device detection
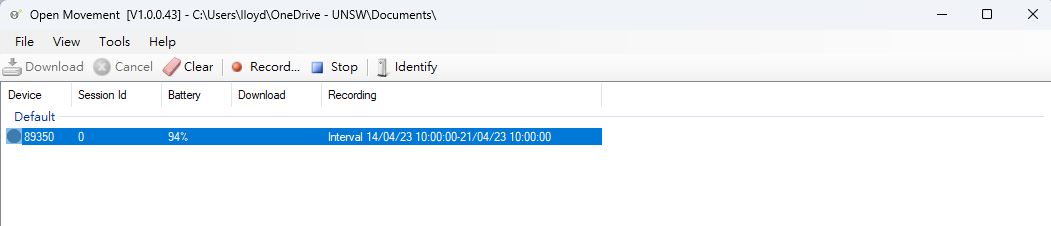
When the sensor is linked to the computer, it should appear in the OMGUI device list.
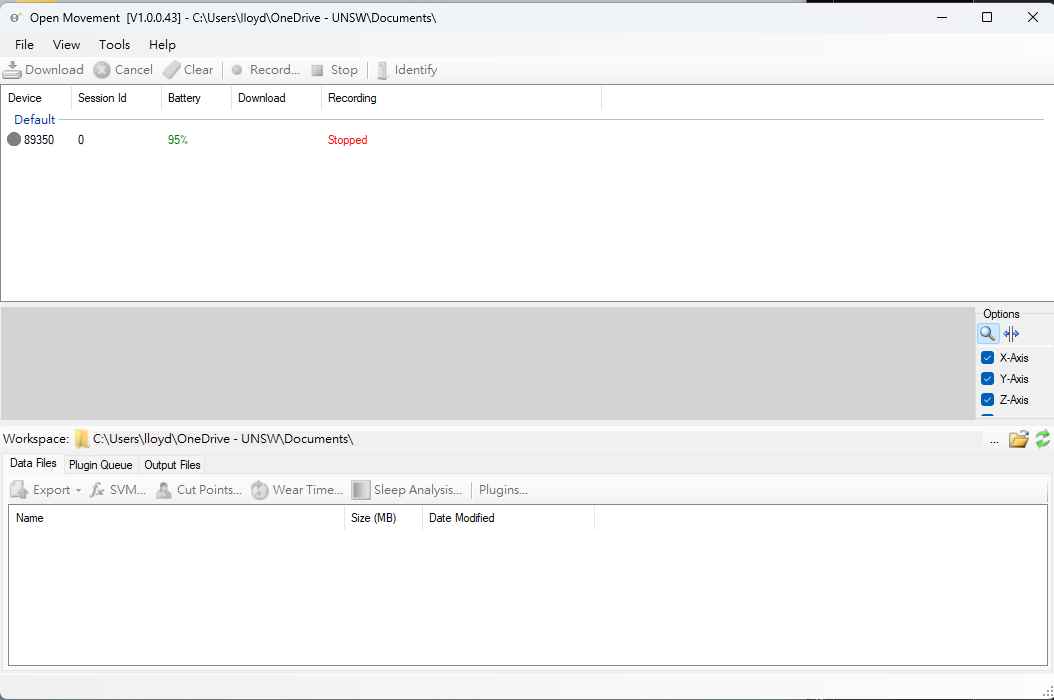
Open recording settings
Select the sensor in the device list, then click Record.
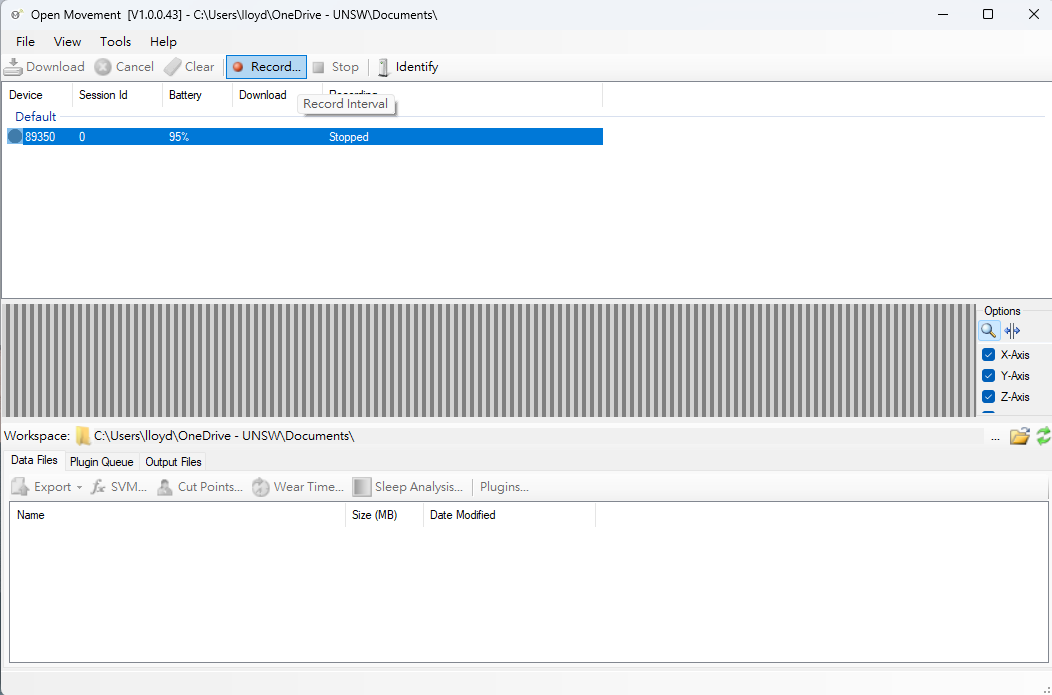
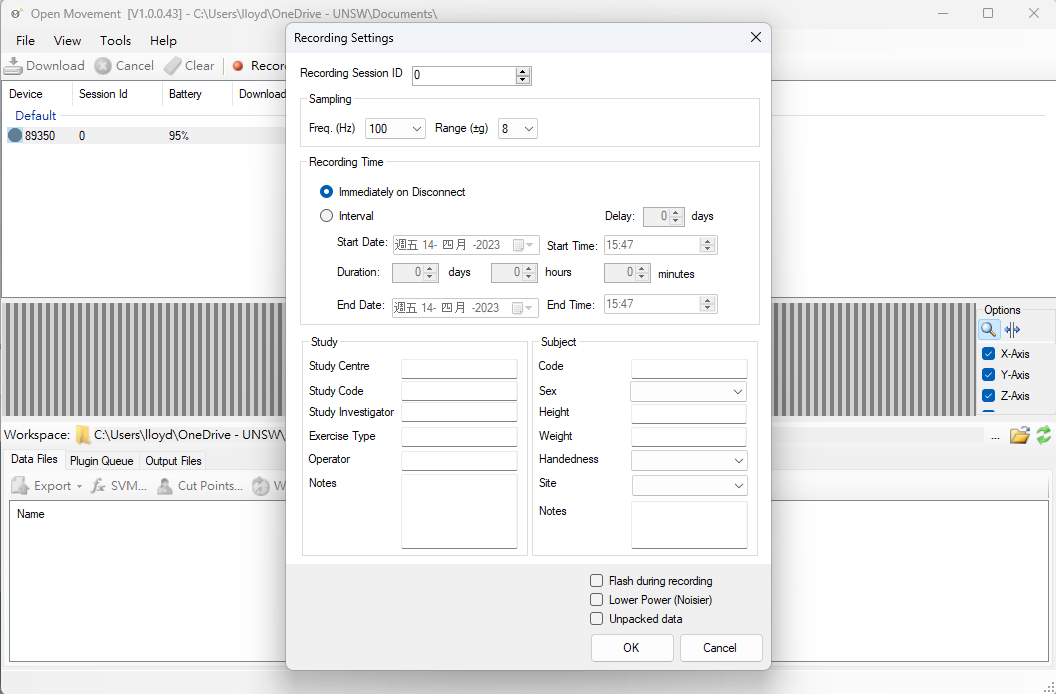
Review the recording window
A Recording Settings pop-up window will open. Review the sensor ID and sampling settings before changing the schedule.
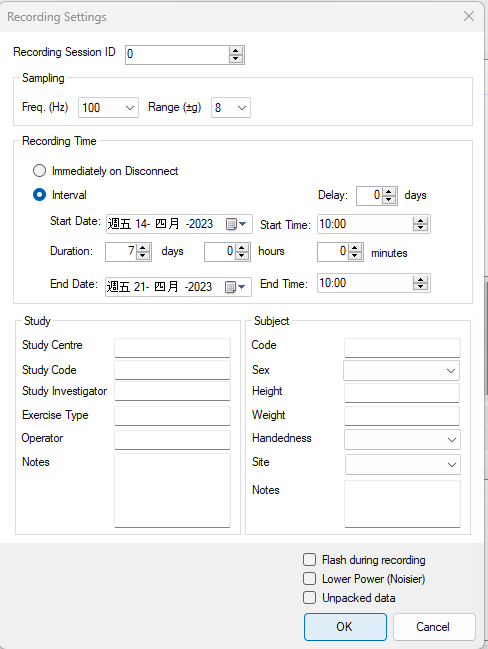
Set interval recording
Select Interval, then enter the Start Date, Start Time and Duration. Use the study-approved seven-day schedule unless the protocol states otherwise.
Save and verify settings
Click OK and confirm that the Recording session displayed in OMGUI is correct.
Deployment, retrieval and export
Issue the device
Give the configured sensor to the wearer together with the user instructions. Remind them to wear the device continuously for seven days unless discomfort or skin irritation occurs.
Record the issue date, planned return date and device serial number in the study log.
Retrieve the sensor
Collect the sensor after seven days and reconnect it to the computer using the data transfer cable.
Check for signs of strap damage or device tampering before data download.
Copy and rename the .CWA file
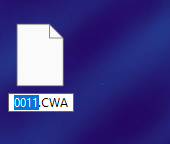
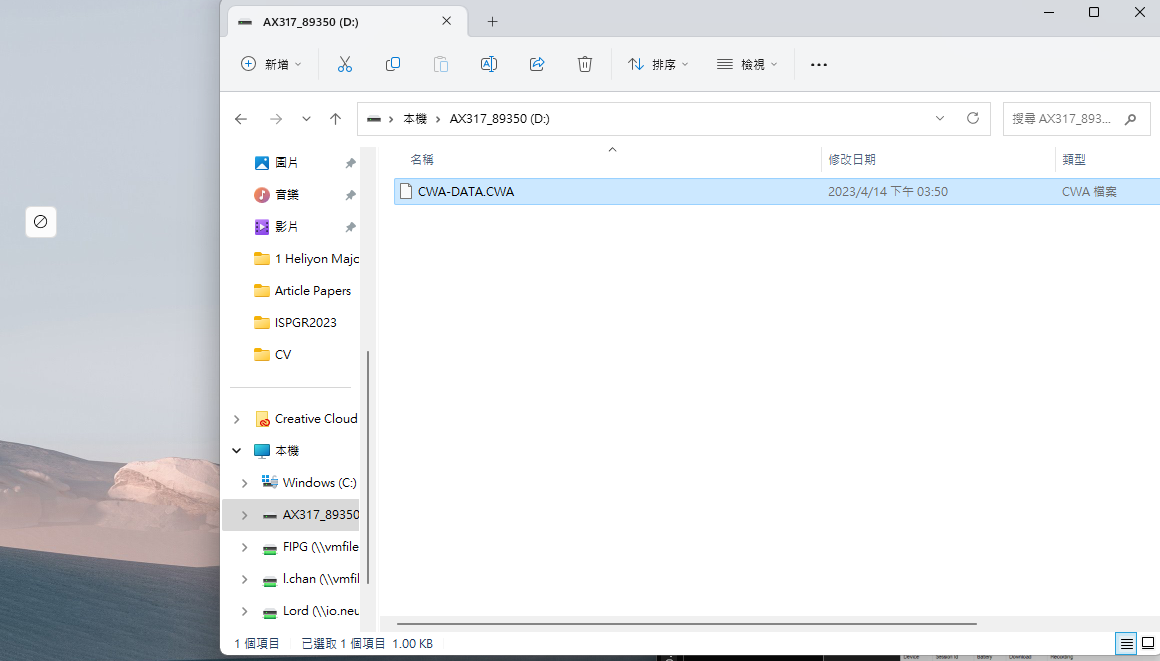
In File Manager, drag the .CWA file from the sensor to the study computer. Rename the file using the participant or trial number before secure transfer to the analysis team.
A common convention is to use the first three digits for the participant number and the fourth digit for the trial number — e.g. 0011.CWA. Participant codes with digits only typically work best with the WatchWalk Platform.
Store and send securely
Store the renamed .CWA file in the approved study folder, then send or upload it through the agreed secure pathway.
Do not email identifiable participant information unless this is specifically approved in the study protocol.
Quality checklist
| Stage | Check |
|---|---|
| Installation | OMGUI opens without error on the study computer |
| Connection | Sensor appears in the OMGUI device list |
| Configuration | Start date, start time and duration match the study schedule |
| Issue | Wearer receives the user instruction sheet and contact details |
| Retrieval | Sensor is collected and reconnected after seven days |
| Export | .CWA file is copied, renamed and stored in the approved study folder |
Troubleshooting
| Issue | Recommended action |
|---|---|
| Sensor does not appear | Use a confirmed data transfer cable, try another USB port and reopen OMGUI. |
| Recording session looks incorrect | Cancel the settings, reopen Record and re-enter the interval details. |
| File name is unclear | Rename using the participant/trial convention before moving the file into the analysis folder. |